
Linux Touchpad Like a Macbook update: progress on multitouch
Linux touchpad: preliminary project funding, survey results
Linux touchpad like a Macbook Pro, May 2020 update
Google Charts Advanced Tooltip Placement
Jetbrains/Rubymine Mass Undo of Accidental Commit Revert
List of Postgres 11 Time Zones
Twilio’s toll/click fraud runs up big customer bills: what to do?
Linux touchpad mini-update
A few tiny notes from the land of Linux touchpad improvements:
- If you’d like to ensure you’re notified when I have substantive updates on the touchpad driver, I’ve setup a subscription list here: https://tinyletter.com/inedibill. It will be used only for sending updates about the touchpad driver, so probably no more than one email every couplefew months
- Matt Mayfield has been doing hero’s work on ensuring that Linux touchpad driver can successfully discard thumb input. His commits to this end are in this branch. In using the libinput debug tool, it’s apparent that Matt’s branch is excellent at allowing a second finger to rest on the touchpad while still taking the active finger input as cursor movement, whereas the latest libinput release tends to interpret any cursor movement with an extra finger down as scrolling. We’re working to make it possible to download an installable version of Matt’s changes soon.
- I’ve begun the process of attempting to enumerate the acceleration differences between Linux and Mac here. If anyone else wants to take a stab at concisely describing how acceleration differs on macOS vs Linux touchpad, feel free to drop me a line at bill -at- staticobject.com and I’ll aim to incorporate your findings.
Hoping to have a more robust update on this in the next couple months, or when we get an installable driver available (if sooner).
Native emoji support (color emojis) in arch Linux
If you’re on Arch, and you use sites with native emojis like Amplenote, you probably get pretty tired of seeing empty black boxes wherever emojis are supposed to be. However, Google isn’t especially forthcoming about the easiest path to fix that.
My experience is that what you want is the ttf-emojione package from AUR. The easiest way to install it is via the Add/Remove Software app:
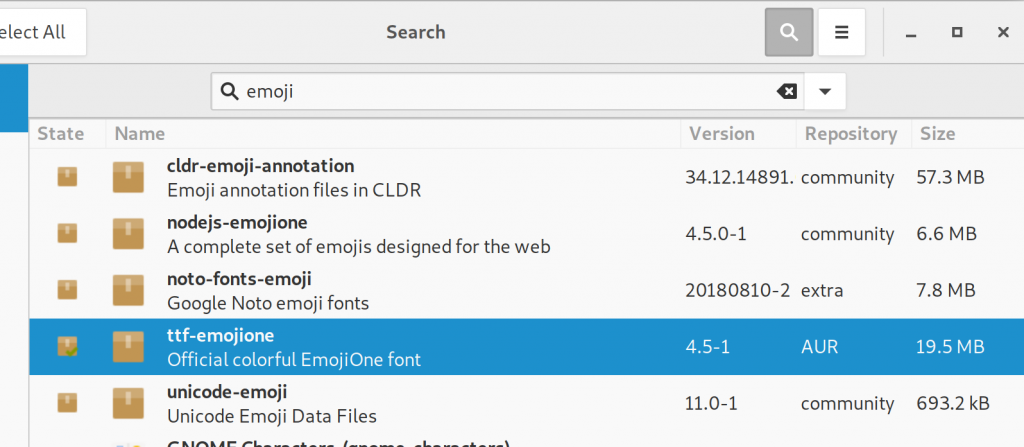
If the command line is more your speed, you should be able to install it via yaourt -S ttf-emojione
After you’ve installed the package, you’ll need to log out and log in for the emojis to show in their full color glory. Here’s a test of whether your handiwork was successful: 🤔🤔🤔